Chapter 1
What Buckley is
Salesforce makes you edit permissions one profile at a time. Buckley lets you round up as many profiles and permission sets as you like, set the access you want once, and commit it to all of them together.
The slow way
Say Read and Edit on Account.Industry needs to reach nine profiles. In Setup that is nine trips through Object Settings, nine field lists, nine saves — and no way to see, at the end, whether all nine actually match.
Miss one and you will not hear about it from Salesforce. You hear about it from the user who cannot see the field.
The Buckley way
One save at the end, not nine. And the matrix shows every container’s current access beside your target, so “did that land?” stops being a question.
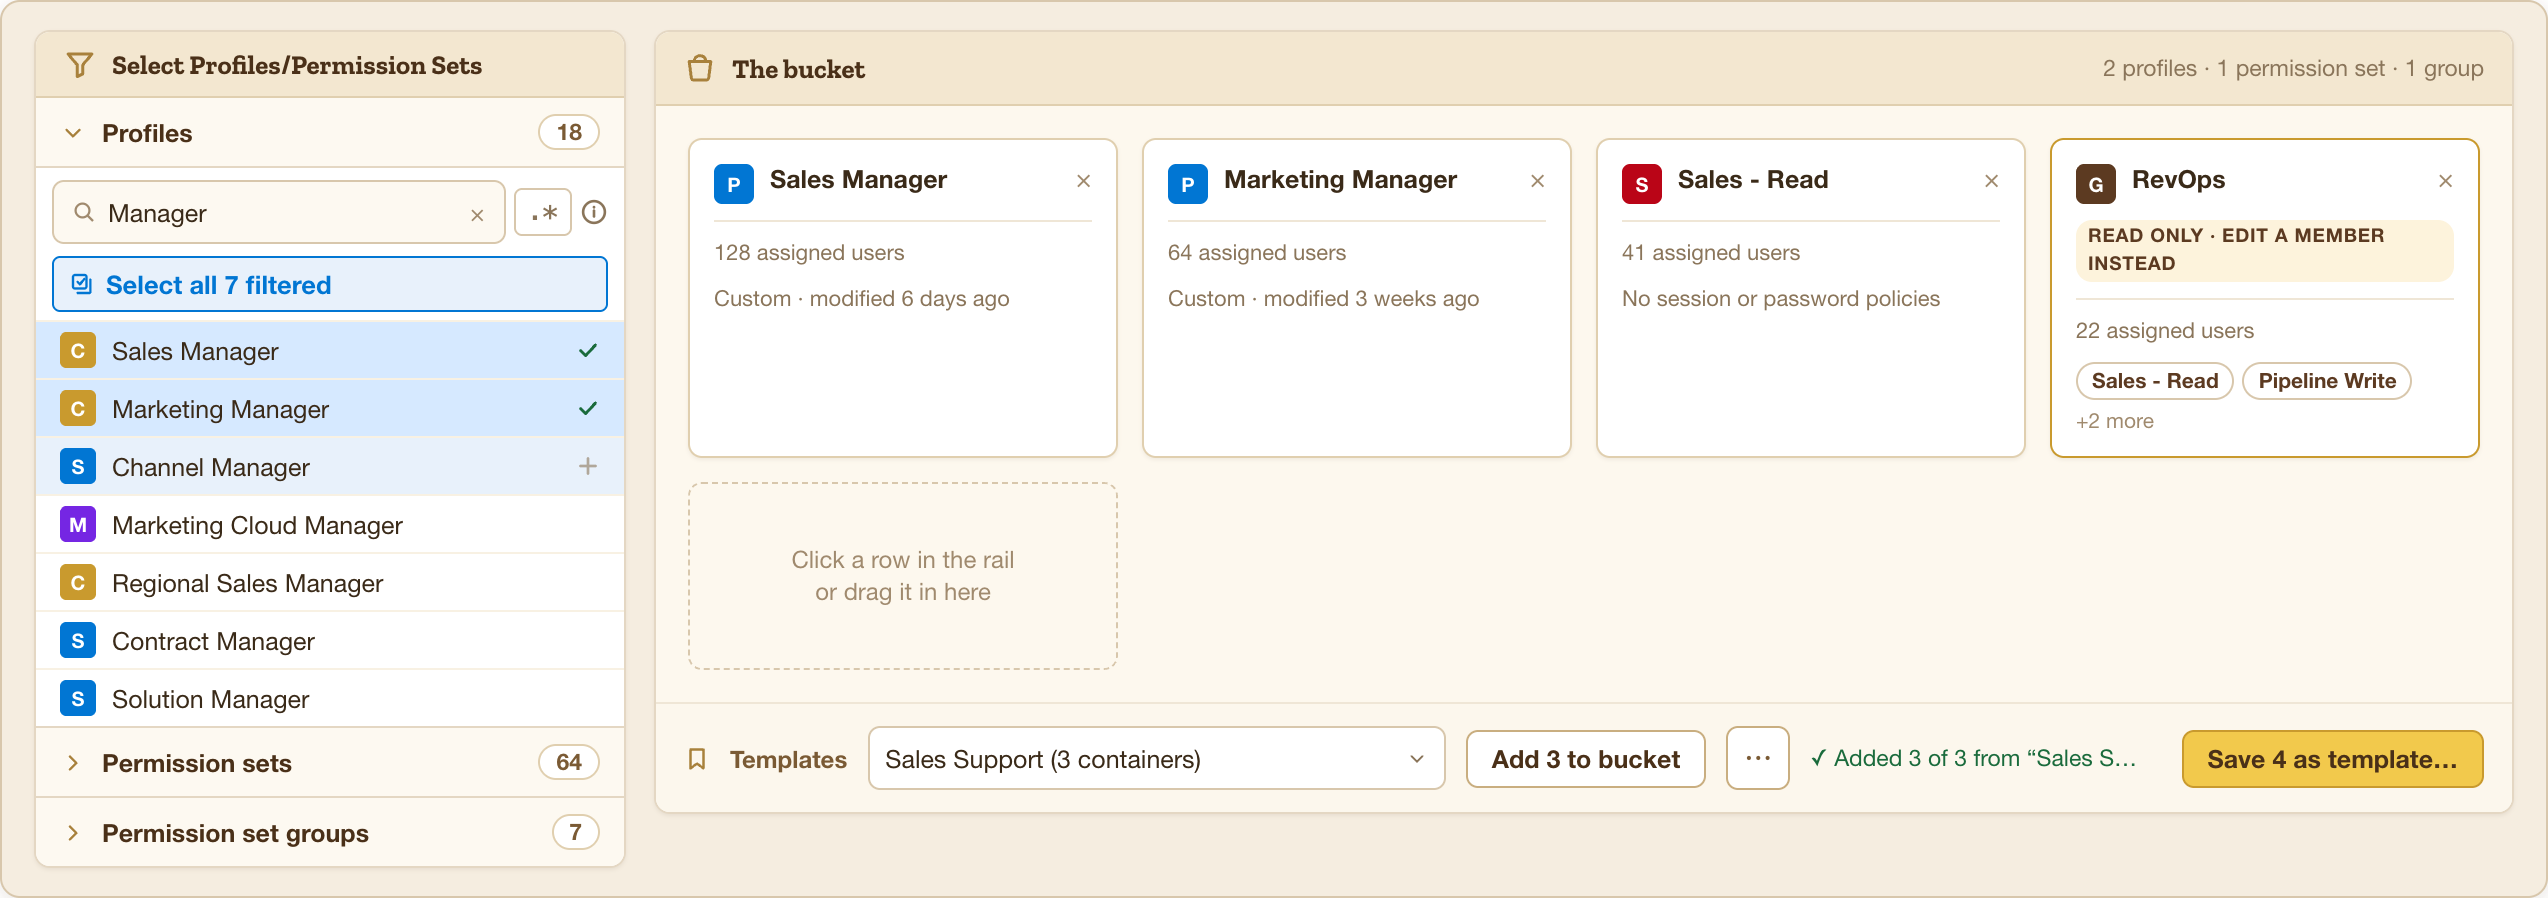
Three words worth knowing
- Container
- A profile or a permission set — anything that can carry access. Buckley treats them the same way, so you can mix them freely in one bucket.
- Bucket
- The containers you have gathered up. Everything in the bucket receives the same edits when you commit.
- Bucket target
- The gold-ruled column where you say what access should be. The columns to its right show what each container has today — and those are editable too, when one container needs to differ.
What Buckley will not do
It will not write anything you did not ask for. Only the objects, fields, and settings you actually touch are written — everything else in the org is left exactly as it was.
It will not touch a permission set group either. Groups inherit their access from the sets inside them, so the platform refuses the write and Buckley shows the column as read-only rather than pretending otherwise.
Nothing leaves the corral until you commit. Everything before that is safe to explore — build a bucket, set the access, read the preview, walk away.